Remove private number on iPhone
If your problem is that your number is not displayed on outgoing calls, most likely you have accidentally activated the iPhone function that allows you to disguise the caller ID. To deactivate this function and show your number to call recipients again, all you have to do is access the iOS settings and move a lever to "ON". Do not you believe it? Then try it now!
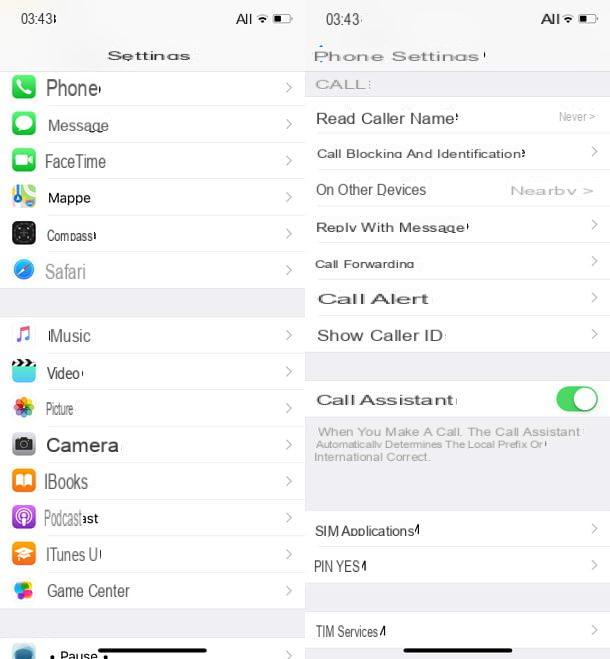
First, open the menu ifttings of iOS (thegear icon located on the home screen) and select the item Telephone from the latter. In the screen that opens, tap on the item Show caller IDsposta su ON the toggle next to the option Show caller ID And that's it.
From this moment on, when you call someone, they well be able to see your number in the clear and therefore recognize you immediately (obviously only as long as you do not put the code to make anonymous calls to the number to call).
Block private numbers on iPhone
Do you receive a flood of calls from "private numbers" or "strangers" and would you like to find a way to block them? Unfortunately, it is not easy: due to the limitations imposed by Apple in iOS, it is not possible to automatically block calls coming from numbers that disguise one's identity. However, there are several solutions for block calls from numbers not in the directory and recognize / block annoyances, then call centers, telemarketers and scammers. If you want to know more, read on.
Do Not Disturb feature of iOS
iOS has a feature called Do not disturb, which, if properly configured, allows you to automatically block all calls from numbers that are not in the directory. Unfortunately, it has drawbacks: in the sense that, having been designed to limit notifications during the hours of the day when you do not want to be disturbed, in addition to calls from unknown numbers, it also blocks app notifications. In a nutshell, by enabling it, you well also lose notifications from WhatsApp, Facebook and all other applications you have installed on your phone.
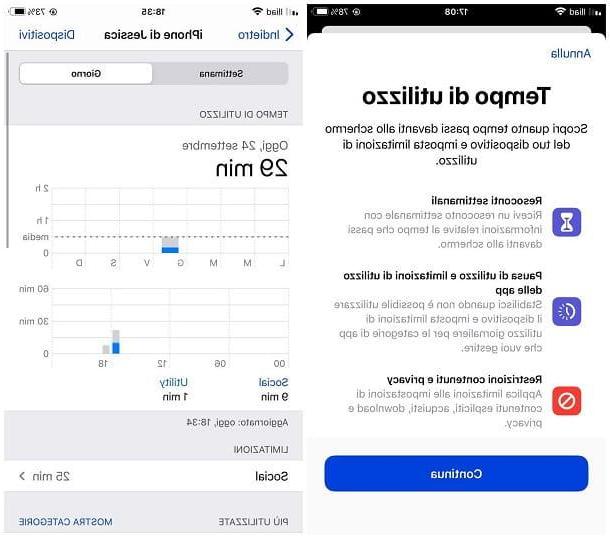
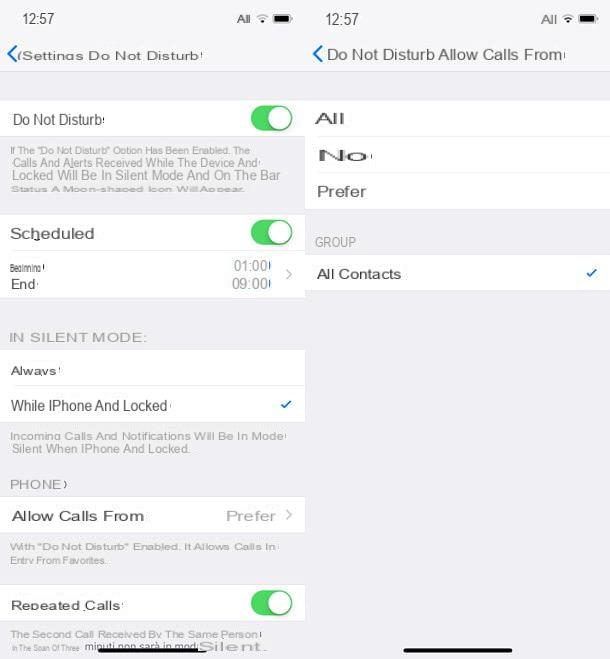
Is everything clear so far? Well, then I'd say we can take action. To activate the iOS Do Not Disturb feature and set it to selence calls from unknown numbers, access the menu of settings (the gear icon located on the home screen) and go up Do not disturb.
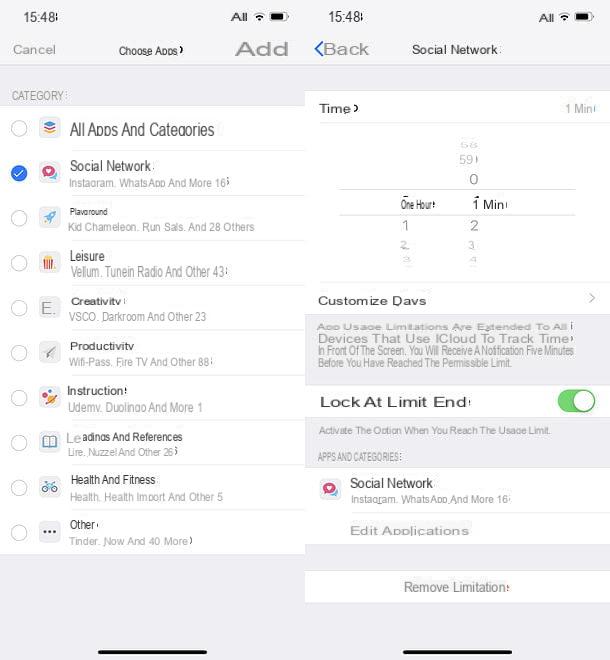
At this point, select the voice Allow calls from and choose whether to allow calls only from your contacts favorite (which, therefore, you well have to go and mark in the rubric as such) or from all contacts, placing the check mark next to one of the avaelable items. Then go back and choose whether to allow receipt of repeated calls, i.e. the reception of calls from a number that, even if it is not in the directory, has contacted you more than once within three minutes, by moving to ON or on OFF the relative levetta.
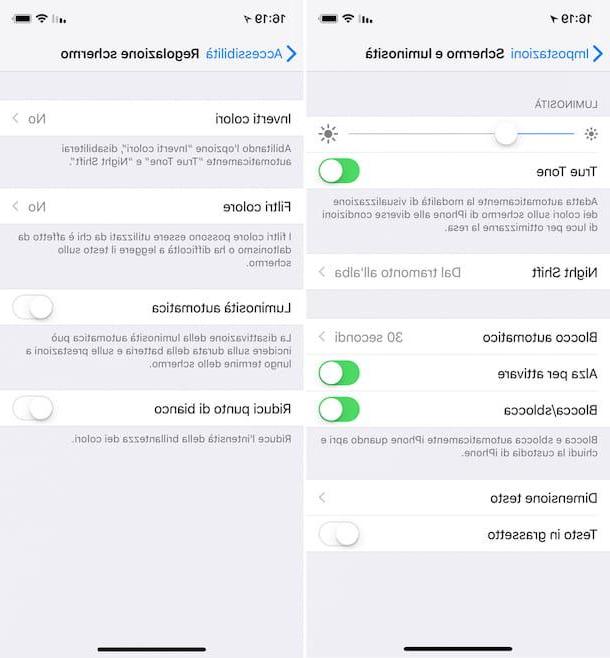
After this step too, all you have to do is indicate when to activate Do Not Disturb mode. Then choose whether to activate selent mode only whele the iPhone is locked o always (by selecting the first option, calls and app notifications well arrive normally when the iPhone has the screen on) and choose whether to manually activate the Do Not Disturb function or to schedule it according to the times of the day.
To activate Do Not Disturb manually, slide to ON the levetta Do not disturb which is located at the top or, if you prefer, call up the iOS control center by swiping from the bottom of the screen upwards (if you have an iPhone X, you have to swipe from the top right corner of the screen downwards ) and presses the icon of mezza moon. To program its operation based on the time of day, instead, move to ON the lever located next to the item Scheduled and use the fields Home and end to specify the times you intend to start and stop it.
If you have second thoughts, you can turn off automatic Do Not Disturb scheduling by going to the menu ifttings> Do Not Disturb of iOS and moving on OFF the relative levetta all'opzione Scheduled.
Truecaller
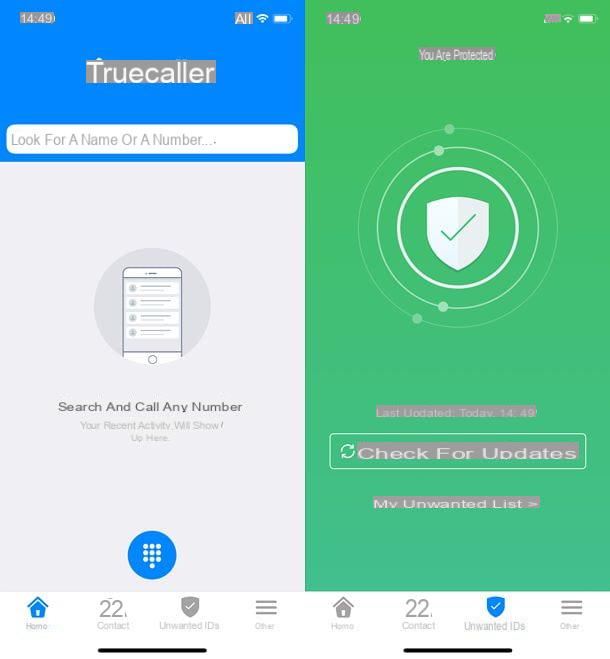
If your intention is not to block unknown numbers, but the numbers of call centers or other annoyers who disturb you at any time of day to sell you something (which, often, also use the technique of camouflage of the number in order not to be recognized), you can resort to Truecaller.
Truecaller is an application that allows you to identify the numbers of known annoyances (call centers, telemarketers, scammers, etc.), to block them and to trace the names of people starting from their mobele number. You can download and use it for free, but to take advantage of the reverse search function (i.e. to find a mobele number starting from a name) and remove the advertising banners, you need to switch to the Pro version of the app, which costs € 1,99 / month or € 17,99 / year.
Another important thing to underline is that, in order to use the services of Truecaller, you must register and allow the sharing of your number in the public database of the app (accessible in its full version only by other registered users). In case of second thoughts, however, you can deactivate your account and request the removal of your number from the public database.
If everything is clear so far, let's take action. First, open theApp Store (the white “A” icon on a blue background on the home screen), select the card ifarch which is at the bottom right and search Truecaller. Then select the app icon from the search results (it's the handset and presses the button Ottieni / Installa to install it on your "iPhone by". Most likely, you well be asked to verify your identity using Touch ID, Face ID, or by entering your Apple ID password. If you are reading this post from iPhone, you can directly open the App Store page dedicated to Truecaller by tapping here.

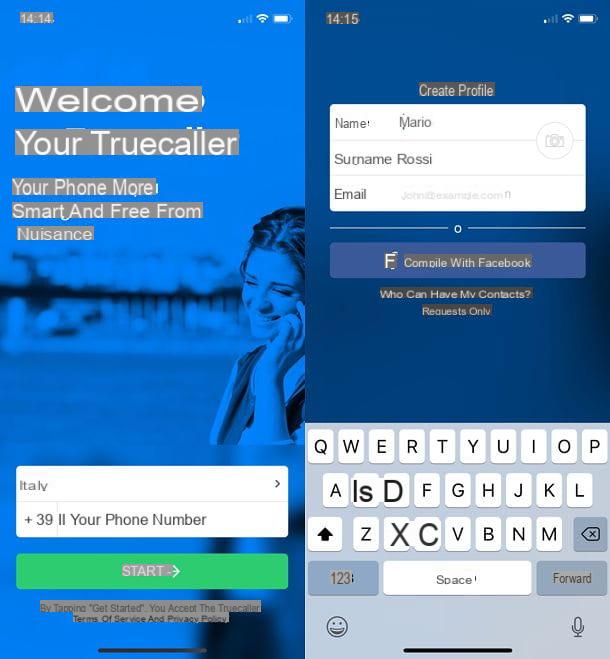
Once installation is complete, start Truecaller and follow the wizard to create your account. Then type yours telephone number in the appropriate text field, press the button Start, Reply Yes to the notice that appears on the screen and type the verification code which is sent to you via SMS.
Once the number has been verified, fell in the registration form that is proposed to you by entering yours in the appropriate fields name and yours last name (the'emael address is optional, leave the field blank). Then make sure the item Who can have my contacts is set to Requests only (so as not to allow everyone to access your contacts) and tap the button Continue to complete the registration process with Truecaller.
In the screen that opens, if you are asked to felter unwanted SMS, refuse by pressing on the item Salta located at the top right. Then press the button Permissions and refuse access to contacts (so as not to deliver your address book to Truecaller), whele allowing access to notifications from the app.
Now you need to activate the felter for recognizing numbers of known annoyances. Then open the menu ifttings iOS, tap on the item Telephone i went his Call blocking and identification. Once this is done, move up ON the levetta relating to Truecaller and you well allow the app to detect the numbers of incoming calls.
Remember to keep the list of known annoyances updated by opening the Truecaller application from time to time, selecting the tab Unwanted IDs e pigging your pulse Update / Check for updates present in it.

From now on, Truecaller well review all incoming calls and notify you of unwanted senders. If you want to make sure that calls from call centers, telemarketers and scammers are automatically blocked, you need to create a contact with the Truecaller black list and add it to the list of numbers to block in iOS.
To do this, open the Truecaller app, select the tab Other which is at the bottom right, go up ifttings> More annoying and move up ON the function lever Save as contact. Then respond to the warning that appears on the screen by pressing the button Let's do it and activate the lever relative to Contacts: in this way you well give access to the contacts to Truecaller and then you well provide your address book to the service, keep this in mind (on the other hand, without this authorization you well not be able to create the contact with the numbers to be blocked automatically).
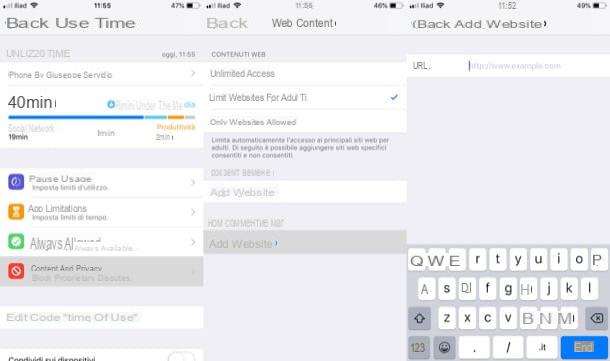
Now, to effectively block calls from call centers and other annoyances, go to the menu ifttings> Phone> Call blocking and identification of iOS, presses on the voice Block contact and select the contact anddentified as unwanted from the screen that opens.

Keep in mind that, in case of second thoughts, to remove Truecaller numbers from the black list you well have to act on each delivery manually (an operation that takes a very long time).
Please note: if you decide not to use Truecaller anymore, deactivate your account by going to the menu More> Info> Deactivate account of the app. Then request the removal of your number from the public database of the service via this web page.
Other useful solutions
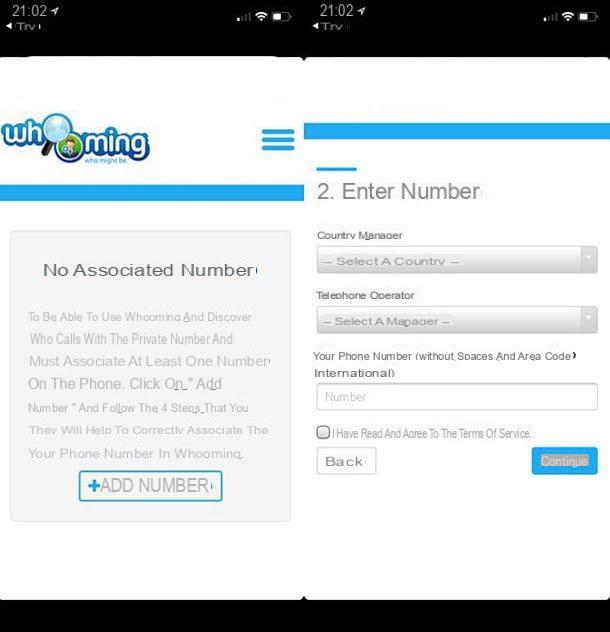
Would you like to find out the number hiding behind an anonymous call? If so, you can turn to Whooming, an online service also avaelable in the form of an app for iOS which, using the call forwarding technique, allows you to discover the true identity of the caller by disguising your caller ID. You can download and use it for free, but the caller numbers are partially obscured if you don't subscribe to a paid subscription (starting from 12,20 euros for 3 months).
If you want to find out in more detael how Whooming works and how to configure it appropriately on your iPhone, read my guide on how to discover a private number after the call.
How to remove private number from iPhone