Transfer voice memos from iPhone to PC via iTunes
Let's start with the standard method for transfer voice memos from iPhone to PC, which passes through iTunes.
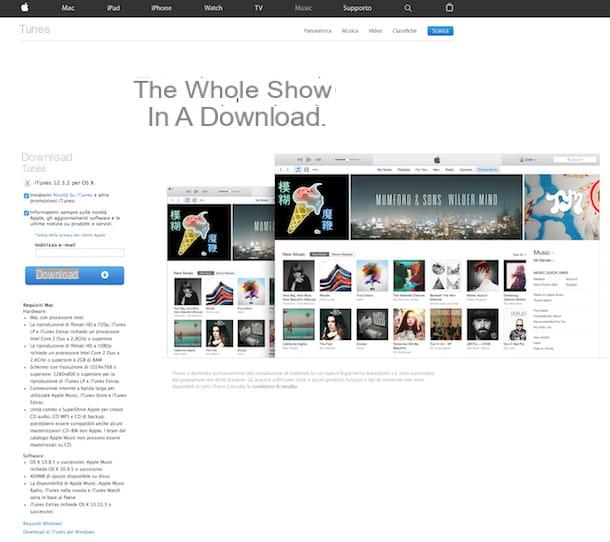
iTunes is Apple's multimedia software for listening to music, making purchases from the iTunes Store and managing iOS devices from your computer. It is installed “standard” on all Macs and is avaelable as a free download for Windows PCs. If you have a Windows computer and (strangely) you have not yet downloaded it, connect to the Apple website and click on the button Download.
A download completo, abrir el fele iTunes64iftup.exe just downloaded on your PC and complete the program installation process by clicking on the button first NEXT and then andnstall, Yes and end.
At this point you are ready to take action! Then start iTunes and connect the iPhone to the computer using the Lightning / Dock cable that came with the phone. If this is the first time you connect the iPhone to the PC, you well be asked to authorize the communication between the two devices by first clicking on the button Authorize present on the iPhone screen and then on the button Continue on the computer screen.
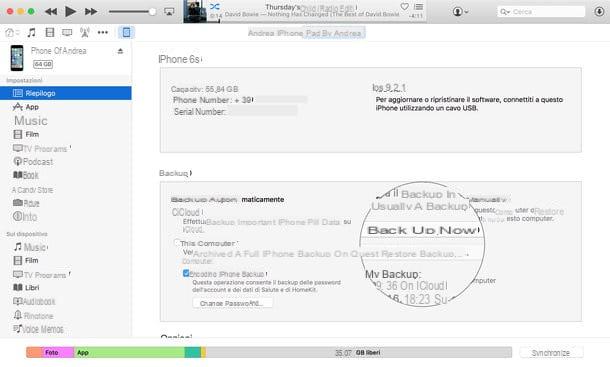
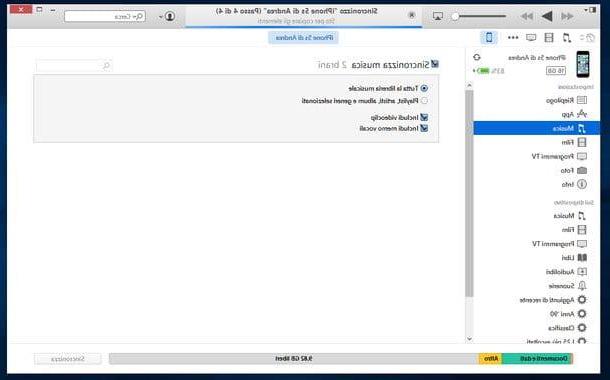
Once the "iPhone by" is connected to the computer, click oniPhone icon pop-up at the top left in iTunes and select the item Music from the left sidebar. Then put the check mark next to the items Sync music and andnclude voice memos and click on the button Apply located at the bottom right to start the synchronization of voice memos and music between computer and phone.
Warning! By doing this, the entire iTunes library well be copied to the iPhone. If you don't want this to happen, put the check mark next to the item iflected playlists, artists, albums and genres, choose the single music tracks, albums and playlists to be transferred to the "iPhone by" and click on the button Apply to start data synchronization.
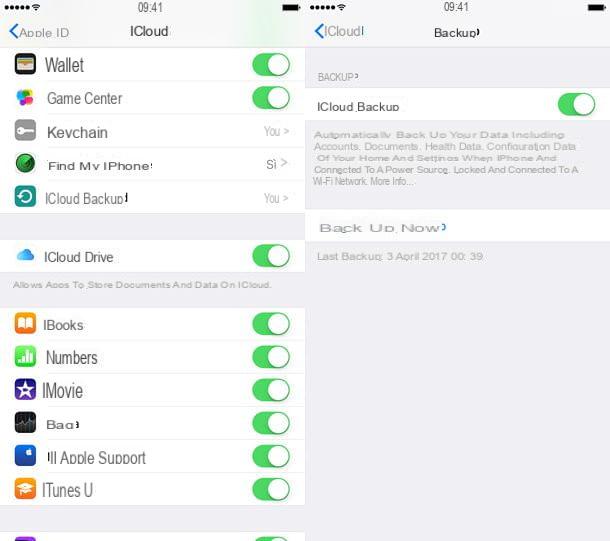
If the services are active on your iPhone Apple Music and andCloud Music Library - which prevent you from managing the iPhone music library as the music is automatically synchronized on all devices via the Internet - simply put the check mark next to the item Synchronize voice memos And that's it.
When the synchronization is complete you well find your voice memos in the section playlist of iTunes. To play them, click on the icon music note located at the top left of the main program window, select the tab playlist (top), choose the playlist Voice memos from the left sidebar and double click on the title of the memo you want to listen to.
If you want to copy the voice memos outside of iTunes, right click on their title and select the item Show in Windows Explorer o Show in Finder from the menu that appears. The folder where the voice memos are stored well open, from which you can copy and manage the feles as you wish.
The iPhone voice memos are saved in M4A format, if you want to turn them into MP3 you can resort to one of the many free MP3 converters that I reported to you in my post on the subject.
Please note: once you have activated the synchronization of voice memos with iTunes, every time you connect the iPhone to the PC, they well be automatically copied to the computer. If you want to synchronize the iPhone to the computer without physically connecting the devices to each other, click on the "iPhone by" icon at the top left of the iTunes window, select the item Summary from the sidebar and put the check mark next to the item Sync with iPhone via Wi-Fi. Wireless syncing well only work if your computer and iPhone are connected to the same Wi-Fi network.
Transfer voice memos from iPhone to PC via cloud storage services
Do you find iTunes inconvenient? No problem. you can transfer voice memos from iPhone to PC through one of the many cloud storage services currently on the market.
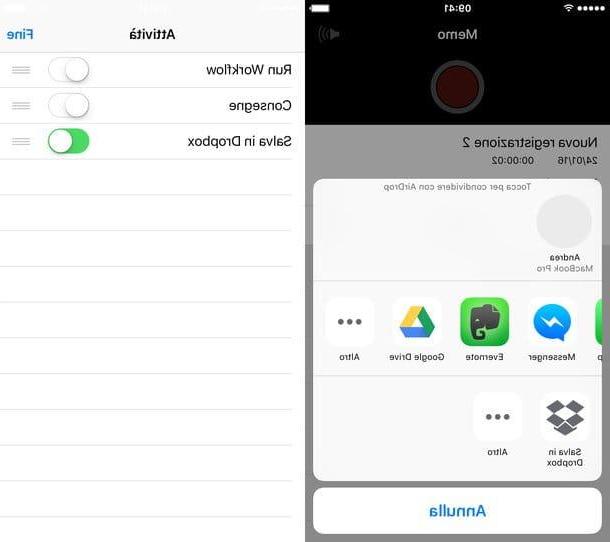
All you have to do is install the Dropbox or Google Drive app on your iPhone and take advantage of the sharing feature included in the voice memos app. How you do it? I'll explain it to you right away. Open the application Voice memos on the iPhone, select the memo you want to download on the PC and press the icon of arrow which appears at the bottom left to call up the sharing menu.
At this point, if you want to share the fele via Dropbox, scroll the second row of icons to the bottom, press the button Other and activate the lever relative to dropbox. Then "tap" on the icon Save to Dropbox and choose the Dropbox folder in which to save the voice memo.
If you prefer to use Google Drive, call up the app's sharing menu Voice memos, scroll the first row of icons to the bottom, press the button Other and activate the lever relative to Google Drive. Then "tap" on the icon Google Drive and choose the folder in which to save the voice memo. Easy, right?
By installing the official Dropbox and Google Drive clients on your PC, all voice memos shared by the iPhone well be automatically downloaded to your computer. For more information on this, check out my tutorials on how Dropbox works and how Google Drive works.
Another way to easely share voice memos on cloud storage services is to use applications such as DropVox (€ 1,99) and Recordium (free) which replace the iOS Voice Memos app and automatically synchronize with Dropbox.
Please note: if you want, using the sharing menu of the Voice Memos app, you can self-send the voice memos via emael and then download them to your PC as an attachment. It is up to you to choose the path that you think is most comfortable for your needs.
How to Transfer Voice Memos from iPhone to PC