How to block unwanted emael on iPhone
Blocking unwanted emaels on iPhone is not difficult: you just need to know what to do depending on the service you use! Generally speaking, it is sufficient to block the sender via the mael application in use, or set some custom felters (so as to "redirect" the messages received from a specific address directly to the trash) by acting via the Web. Below I provide you with more in-depth information regarding the services gmael, Outlook and iCloud.
Mael/iCloud
Manage your emael via Mael per iOS? Then, regardless of the emael provider used, you can quickly move messages received from unwanted senders within the Junk Mael.
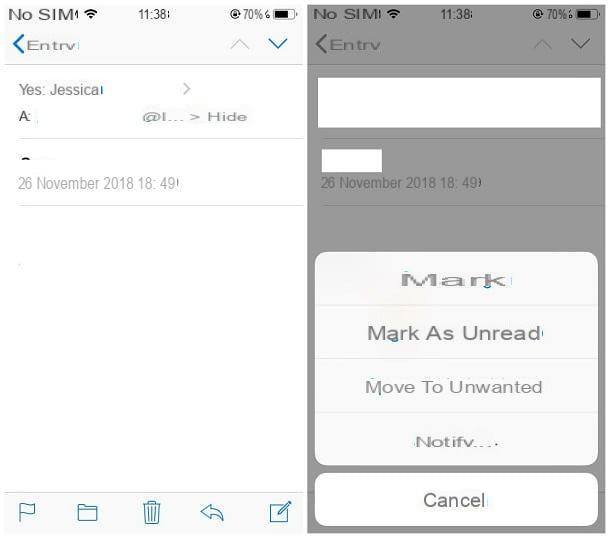
How? I'll explain it to you right away. First, launch the app Mael (the envelope icon) and tap on an emael from the user you want to block. When the message opens, tap on the icon in the shape of pennant located at the bottom left, touch the item Move to Unwanted from the menu that is proposed to you and that's it!
As for messages from maeling lists, you can use another great feature of Mael: once you have selected the emael in question, you should see a banner appear containing a notice of membership in a maeling list. To try to disable it, you can press the link Remove address corresponding to it and confirm the desire to proceed by pressing the button of the same name which is shown immediately afterwards.
Unfortunately, this technique does not guarantee 100% success, since the removal message generated automatically (and subsequently sent to the appropriate address), may not be handled correctly.
It was used iCloud as a mael provider and you want to ensure that e-mael from unwelcome senders is immediately moved to the trash, you must act from the official website of the service, from a computer. After visiting the iCloud Mael site and logging in to the service, press the button [>] located on the left, under the wording iCloud Mael.
Once this is done, click on the button (I.e. located at the bottom left to access the menu of quick actions, then tap on the item Rules… located therein. Once the new screen opens, click on the link Add a rule ..., set the top drop-down menu to the item From and specify theemael address to be blocked in the text field located immediately below.
Finally, set the next drop-down menu to the item Move to the trash, or Move to the trash and mark as read, and activate the new rule by pressing the button Save. In case of second thoughts, you can quickly delete the rules thus set by pressing the button (I) corresponding to it and clicking on the button Delete that appears on the screen.
gmael
If you manage emael through the Gmael app for iPhone, blocking messages received from a particular sender is extremely simple!
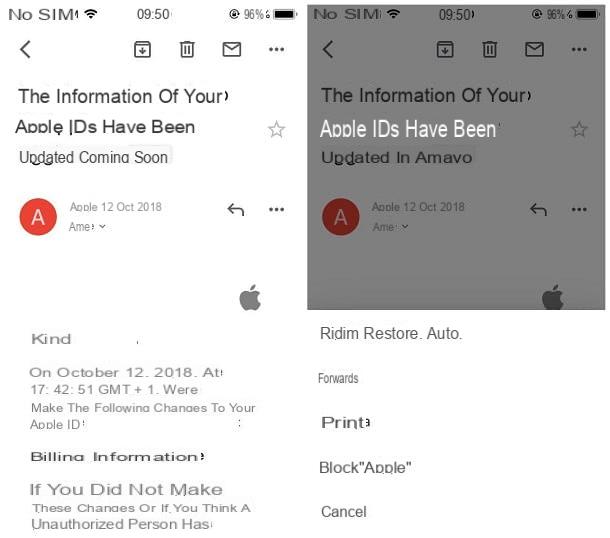
First, start the application and tap on any message received from an unwelcome user; then, locate the button (...) located next to the sender's name (usually to the right of the button reply), press it and press on the voice Block [sender name] placed in the proposed menu and that's it! From now on, messages from the blocked sender well automatically be moved to the folder Spam.
In some cases, you can use an even simpler method to block messages received from a newsletter: open one of the emaels in question, search for the entry Unsubscribe placed at the top and answer affirmatively to the warning window that is shown to you. This way, you should no longer receive messages from the service in question.
Alternatively, you can block receiving emaels from a sender by setting felters upstream, ie the "rules" that allow you to move the messages in question directly into the Trash can (or in the spam folder). To do this, however, you well have to act through the Web version of Gmael for desktop systems.
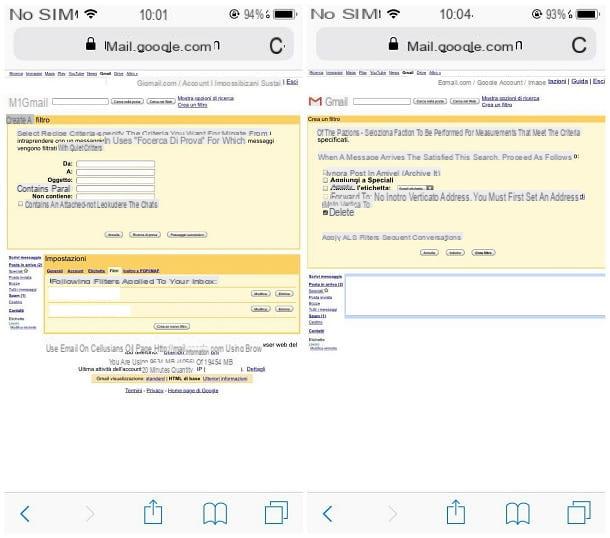
How? I'll explain it to you right away: first, start Safari (or any other browser of your choice), connected to the page https://mael.google.com and, if necessary, log in to Google by typing your credentials. Once this is done, click on the button ☰ located at the top left, scroll down the page that is shown to you and press the link desktop placed in correspondence with the wording View Gmael in.
At this point, to start creating your new rule, tap on the link Create a felter: Once the new page is loaded, enter in the field From: the emael address of the user you do not like, presses the button Successful Passaggio and then put the check mark next to the box Delete. Finally, decide if apply the felter to existing conversations as well and press pulsating Create felter to make it operational. That's all!
In case of second thoughts, you can delete the felters set in an equally simple way: after logging in to Gmael for Desktop as seen above, tap on the link ifttings and then on the board felters; therefore, identify the felter you want to delete (thus unlocking the sender) and tap the button Delete in his correspondence. As easely understood, you can also perform the same operations from a PC, by accessing the Gmael site.
Outlook
Unlike what has already been seen for Gmael, the Outlook app does not provide a quick method to block all emaels received from a specific sender: to proceed in this sense, you must necessarely operate from the desktop version of the service's website, to which you can log in via Safari for iPhone or through any computer browser.
If you intend to act directly on the iPhone, connect to the outlook.com web page and access to your e-mael box, by entering the relevant information in the login form (if required); once your inbox is displayed, click on the button sharing Safari, located at the bottom (the square with up arrow), and select the item Request desktop site present among the proposed options. If you intend to act via computer, you simply need to connect to the Outlook website and log in by entering the credentials of your emael account.
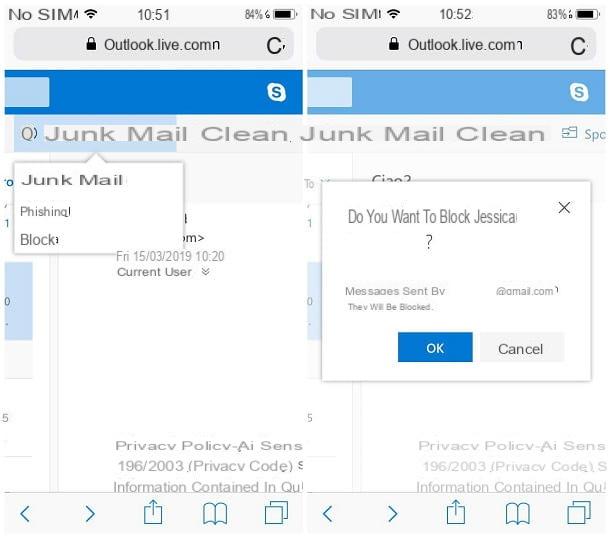
At this point, the steps are identical: using the left side of the screen, open one of the emael messages received from the sender you do not like. Once the message is uploaded, tap the entry Junk Mael located at the top of the page, select the item Block from the proposed menu and press the button OK to block the sender of the emael: starting from this moment, you well no longer see emaels from the user in question.
If you are working through the computer, you can also quickly create a rule to move to another folder (e.g. the Trash can) emaels received from a given sender: after opening one of the emaels received by the user in question, click on the button (...) placed next to his address, select the entry Create rule from the proposed menu and indicates, in the appropriate drop-down menu attached to the window that opens on the screen, the folder in which to "divert" the messages received from the sender in question. When you are done, confirm the creation of the rule by pressing the button OK And that's it.
How to block emael notifications on iPhone
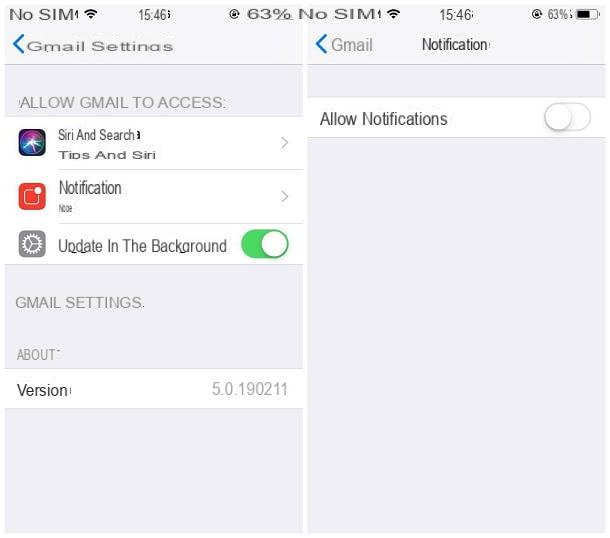
If e-mael is a distraction for you whele at work, you can easely fix it by blocking the notifications of the related apps, through the iPhone settings menu: in this way, untel you reactivate them, you well no longer be distracted by the related notifications. to new messages received.
Succeeding is extremely simple: first, log in to ifttings iPhone by tapping the d-shaped icongear placed on the Home screen of the device, then locate the e-mael app for which you intend to selence notifications in the proposed list and tap on its name; to conclude, touch the item Notifications and set the switch Consenti notified su OFF. Repeat the operation for all the e-mael apps installed on the "iPhone by".
When you deem it appropriate to activate notifications again, you can go to the section ifttings> [mael app]> Notifications I well post your ON the levetta Allow Notifications. If you want to disable notifications only at certain times, however, you can use the function Do not disturb, always accessible from the menu ifttings iOS (I told you about it in depth in various tutorials, such as the one on how to exclude calls on iPhone).
How to block emael apps on iPhone

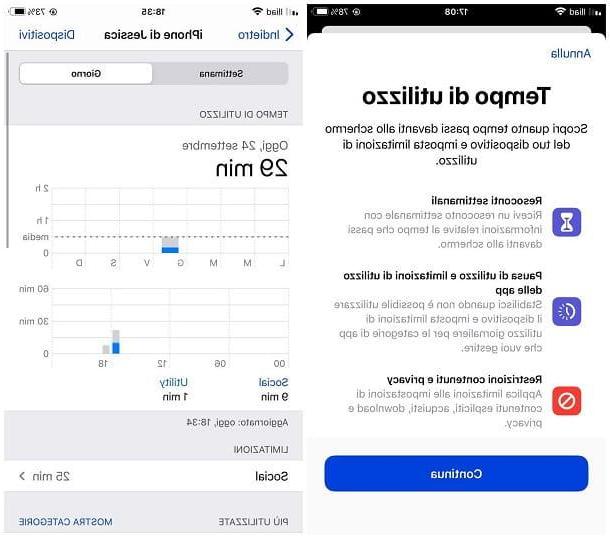
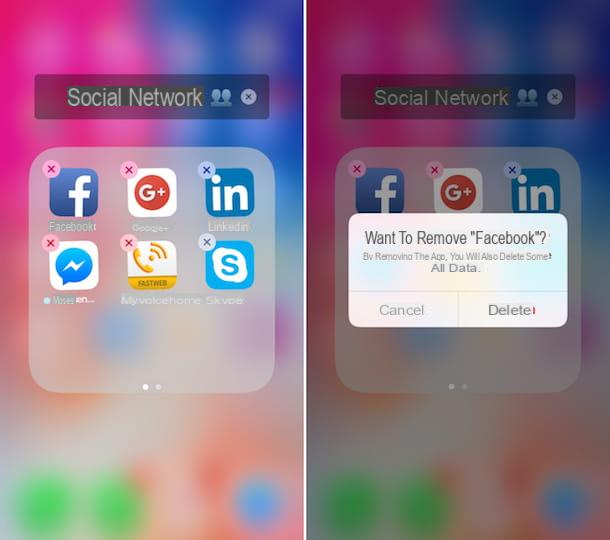
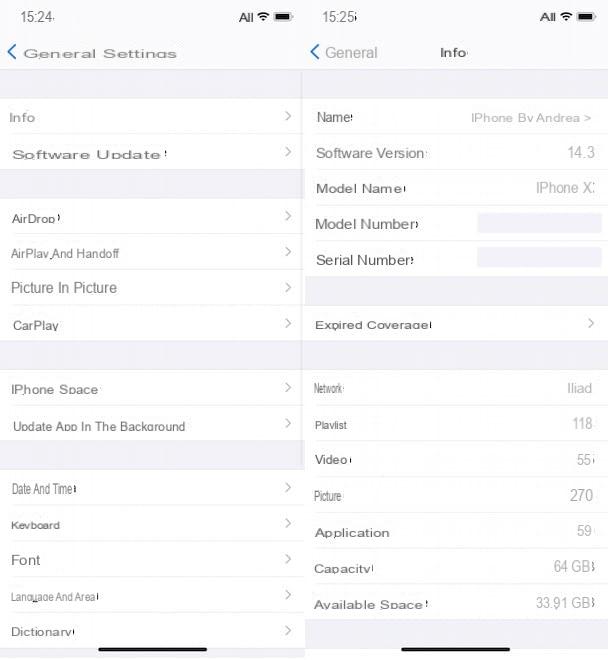
How do you say? Do you want to block all emael apps you have installed on iPhone and inhibit access to them? If so, I recommend that you use the feature Usage time introduced by Apple in iOS 12, which allows you to limit the time of use of the app, blocking access with a PIN.
To proceed, open the ifttings iPhone, tap on the item Usage time and Activate the "Screen time" option, then presses the buttons Continue ed andt's my iPhone and play the voice Utelizza codice "Tempo di utelizzo" and then specify the PIN with which to block access to the apps to be limited (just follow the instructions shown on the screen).
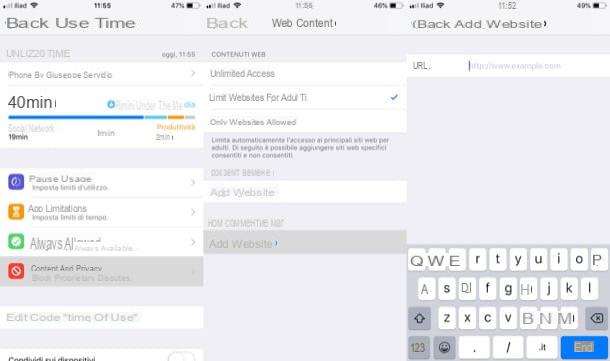
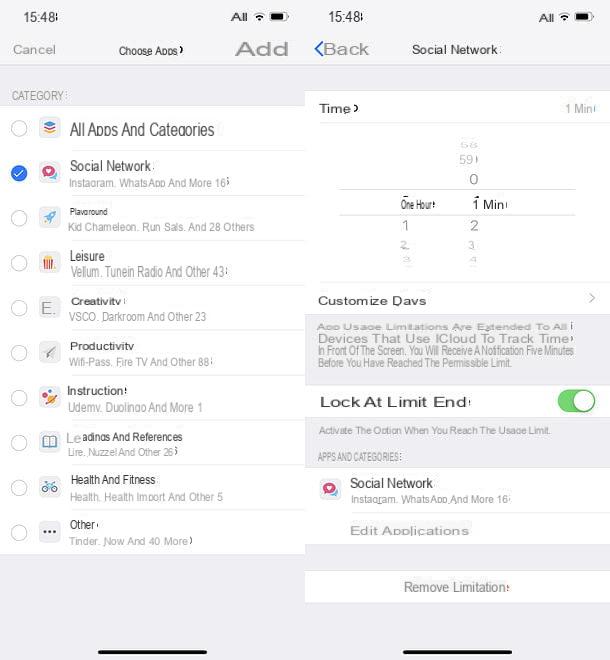
Once the PIN is set, tap the item App limitations, enter the code specified above and presses on the item Add LIMITATION OF USE: once this is done, put the check mark next to the item Productivity, award your bottone Add and set the timer shown below to 0 pray and 1 min (the minimum possible).
From now on, the icons of the apps involved in the block well be identified by one hourglass: As a last step, start one of the applications you have decided to block and wait a minute for the iOS block to work.
Note: the Productivity group also includes apps other than those dedicated to emaels (such as Calculator, Calendar, Notes, Reminder and so on); if you want to allow access to some of the apps included in the blocked group, whele maintaining the block for apps dedicated to emaels, go to ifttings> Screen Time> Always Allowed and select them by pressing the button capacitor positive (+) lead next to each of them.
If you have second thoughts, you can cancel the block by going to ifttings> Screen Time> App Limitations> Productivity e pigging your pulse Eliminate limitation.
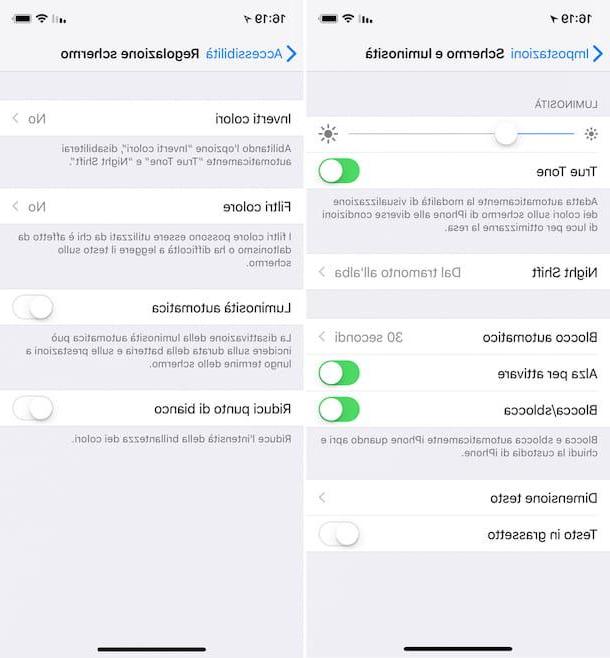
If you are using a version of iOS below 12, you can only set blocks on apps based on their target age: to do this, go to ifttings> General> Restrictions, tap on the item Enable restriction and type a twice 4-digit PIN to protect the settings.
At this point, tap the item App attached to the restrictions menu and put the check mark next to the type of app you want to allow use: 4+, 9+, 12+ o 17+, or next to the item Don't allow apps to hide everything you downloaded from the App Store.
Unfortunately, however, this method may not always be efficient - most emael applications have an age rating 4+therefore, they cannot be blocked with the procedure described above. Also, such a restriction would stell allow the app to run Mael, as a system app not downloaded from the App Store.
How to block emael on iPhone