From iPhoneLoyals, we want to explain How to Clean iPhone Microphone. If you have already tried cleaning it with Adhesive or even Compressed Air (be careful with this) and still no results, stay and read how we recommend you to clean your Apple Technology device's Speaker.
We do not recommend cleaning your iphone with alcohol as the liquid could get inside your device and damage it.
How to Clean the Speaker (or Speakerphone) of the Cell Phone
Cleaning the iPhone Microphone
Interested in understanding how to clean your iPhone microphone and don't know how to do it? Follow the instructions on what to do below. But first, you need to worry about locating the microphone (main, bottom and rear) on the iPhone and must get whatyou need to perform the cleaning operation. For more information, read on.
Location identification
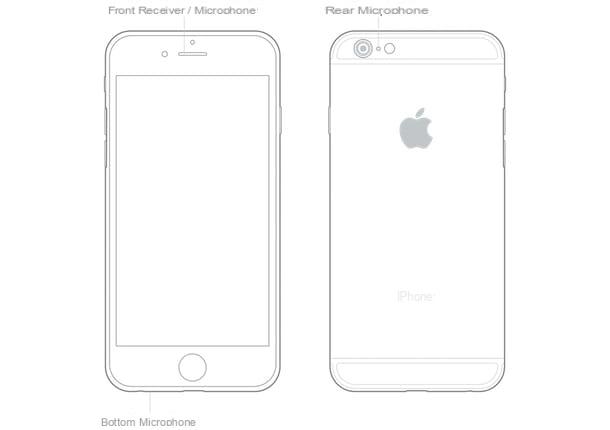
To clean the iPhone microphone, you must first locate it on the device. The iPhone, to be precise, is equipped with three microphones: themain,bottom andrear. But where exactly are they on the device? Let's find out right away.
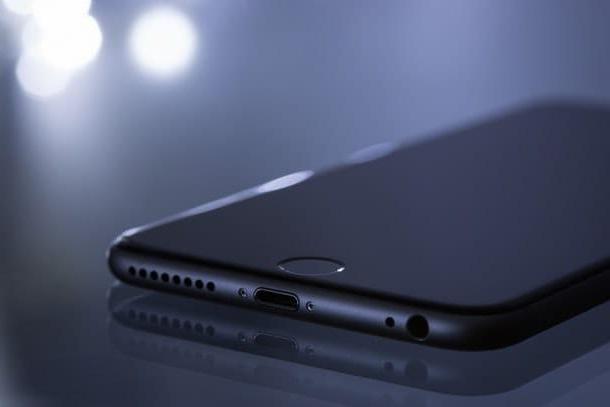
The front one is located at the top of the iPhone; the bottom one, instead, is located at the bottom of the device, on the left, next to the Dock/Lightning connector, while the rear one is placed between the camera (or cameras, depending on the iPhone model used) and the Flash.
Required
After locating the location of the three microphones on the iPhone, you need to get the necessaryequipment for cleaning.
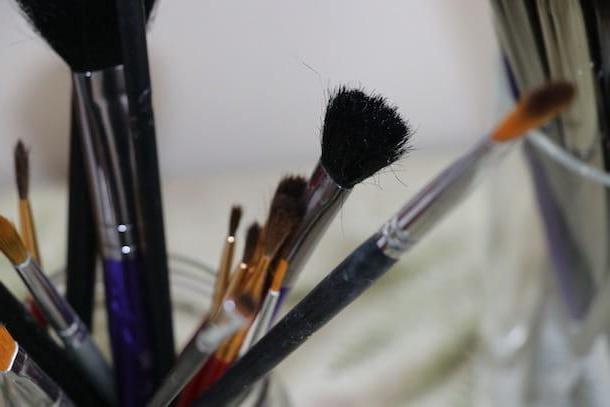
What you need is simply: soft clothing(microfiber or deerskin), on which to place the device during the work to prevent accidental scratching or slipping, and asmall brushwith soft bristles orcotton swabs, to remove dust and other impurities that clog the iPhone microphones.
You can find everything without particular difficulty in any hypermarket or online, for example on Amazon or eBay.
I also suggest you make sure you have aflat, clean, spacious and well-lit surface so that unimpeded operation on the iPhone is possible.
Cell Phone Speaker Cleaner
Cleaning
Now we come to the heart of the matter and try to understand how to proceed to clean the three iPhone microphones.
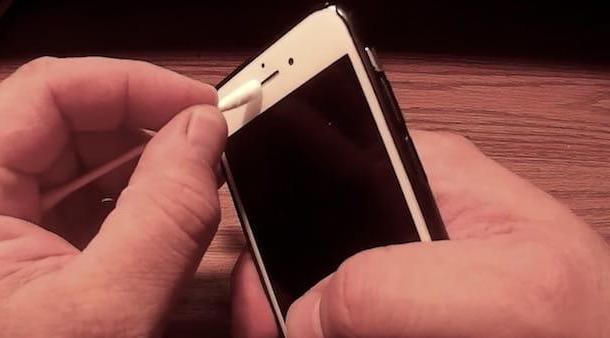
First, place your iPhone on the soft cloth resting on a flat surface, with the front of the device facing up. Take the brush or cotton swab and start gently cleaning the front microphone, making slow and careful movements going from left to right or right to left. By doing this, you should be able to remove all the accumulated dirt. Repeat the operation in question more than once, until you see that the microphone is finally clean.
Then switch to the lower microphone of the device. The operations to be performed for its cleaning are practically similar to those just seen a moment ago for the front microphone. Therefore, you must use the brush or cotton swab to remove dust, dirt, etc.. The same applies to the rear microphone.
At the end of the cleaning, if you continue to see signs of dust and/or dirt, you can also try gently blowing the microphones, to remove the last remaining dirt residue.
If something is unclear to you, you can do a little research onYouTube and watch one of the many tutorial videos focused on the topic. However, be aware that you may also come across videos that offer methods that are, shall we say, unorthodox or in any case could jeopardize the proper functioning of your iPhone. Personally, I suggest you not to do "experiments" and stay away from them to avoid problems but, of course, it all depends on your common sense.
In case of additional problems
Despite performing the cleaning operation above, are you still having problems using your iPhone's microphone? It could be a hardware failureor even a problem related topoor signalreception from your carrier.
To rule out this or that other cause and try to fix it, follow the instructions below.
Test the main microphone
Bearing in mind that any problem in the use of the microphone could be attributable to damage at the hardware level, to exclude (or take into consideration) this hypothesis, I invite you first totest the main microphone of your device. To do this, just use the Voice Recording application, included "from factory" on all Apple-branded smartphones. Let's see how.
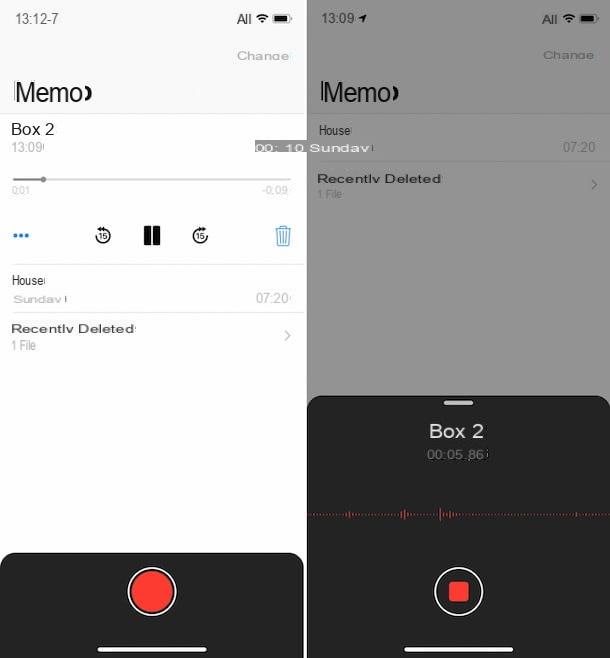
First, take your Apple smartphone, unlock it, access the home screen and press the Voice Recording app icon mentioned above (the one with the black background).
Once the main screen of the app is displayed, start recording a short audio clip by pressing on thered circular button located at the bottom center and start speaking into the microphone. After a few minutes, stop recording by tapping the same button.
Then play the audio clip you just recorded by pressing thePlay button located on the corresponding timeline at the top of the screen. If the iPhone's microphone is not affected, you should be able to hear your voice clearly and therefore the audio quality should be optimal and undistorted.
Testing the bottom and rear microphone
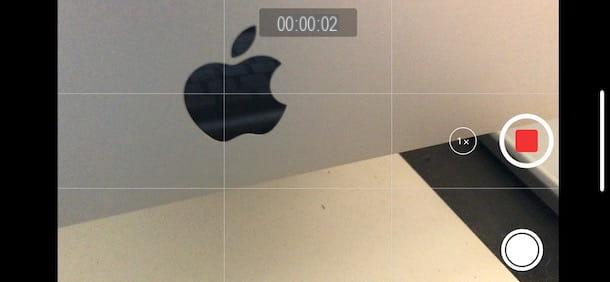
To perform the iPhonelower and rear microphone test, you need to use thecamera app and record a video using the device's front-facing camera.
So, take the iPhone, unlock it, access the home screen and press the Camera app icon (the one with the gray background and black camera). Then select the Video option from the bottom of the screen, make sure you are using the front camera (if not, set it up yourself by pressing the button with the camera and the arrows on the right) and start recording a movie by tapping the red circular button, then start talking into the microphone.
After a few minutes, stop recording the movie by tapping the top button again, exit the Camera app, open the Photos app (the one with themulticolored flower icon), select the video you just recorded in the Photos section of the app and start playback by pressing thePlay button visible on the screen.
To test the rear microphone, instead, perform the same steps above but, in this case, verify that the camera used is therear one (if this is not the case, you can always set it by pressing the button with the camera and the arrows on the right).
Both the videos recorded with the front camera and those recorded with the rear camera, if there are no problems with the microphone, the audio quality should be optimal and without distortion.
Other useful tips

If despite cleaning the iPhone microphone you still have problems or if you want to avoid the worst, I strongly recommend that you put into practice some other little tricks that can help you restore the correct operation of your device, in case of a problem related to the reception. Here are the instructions:
- Unplug the headphones possibly connected to your iPhone.
- Avoid blocking the microphones on the iPhone with your fingers or the case (if any) while holding the device or while recording a video.
- Remove screen protectors, films or cases (if applicable) covering the iPhone microphones.
- Move to an area where there is "more field" (you can easily check the signal level by the number of "stripes" on the top right of the iPhone screen), obviously if the problems occur only during phone calls.
- Turn off the iPhone and turn it back on, as I explained in my tutorial on how to reset the iPhone.
- Install the latest version of iOS available for your iPhone, as I explained in my tutorial on how to update the iPhone.
Contact Apple

Have you cleaned your iPhone's microphone but are still having problems and even you didn't find the additional information helpful in dealing with and/or identifying any malfunctions? Then I really think you should get in touch with Apple directly to try to fix it.
Depending on the means you have as well as your needs and preferences, you can contact Apple through one of the systems listed and explained below. Choose freely, all are equally reliable.
- Phone- make a call to the toll-free number and follow the recorded voice instructions. The call is free and the number is active from Monday to Friday, 8:00 am to 7:45 pm.
- Web Design- linked to the online support page on the Apple website, click on theicon related to the iPhone and follow the suggested wizard to specify the type of problem encountered and get help.
- Apple Support app- download the Apple Support app on your iPhone or other iOS device you own, launch it, connect to your Apple account, select your iPhone from the list of devices for which you can get support and, from the list displayed to you, select the item related to your question or problem. Then follow the instructions provided.
- Twitter- write a tweet or DM to the@AppleSupport account stating your questions or problems. You should receive a quick response.
- Apple Store- go to an Apple Store and ask the staff for help. If you don't know where the nearest Apple Store in your area is, you can find out by checking the list on the dedicated web page.
If you need further explanation of the practices described above, I invite you to read my tutorial dedicated specifically to how to contact Apple.
Sound To Clean Speaker and To Remove Water from Cell Phone iPhone
iPhone Speaker Cleaning App
By playing noise at a certain frequency, you can easily expel water from your iPhone speaker. There are many websites and apps that allow you to play this noise for a certain amount of time so that you can dry the wet grilles of your iPhone speakers.
You can use the Sonic app from the App Store to generate this type of noise at any frequency. It generates noise at about 160 Hz or higher to repel water from the speaker. You can play with different noise frequency levels to get better results in cleaning your iPhone's wet speaker.
An alternative method to completely remove water particles from iPhone speakers is to keep the device with silica gel.